With so many ways to “de stress” its stressful trying to figure out which one to try. Should you take a hike, go to a yoga class, group meditation, try a sound bath!? Instead of all of that go old school and try your hand at candle making. Candle making is not only super easy but also quite relaxing once you get the hang of it. This project is also a great excuse to text a friend to join and make something instead of always doing brunch. When you un-mold your first candle you will get all the DIY gold stars and want to do more!
Once you heat up that wax and watch the magic happen your worries will slip away in no time. This is great DIY regardless if you consider yourself crafty because it is sooooo easy! Once you go through the steps the first time it will all make sense. Warning candle making can be addictive and there are no support groups for that (or are there?)
What Tools Do I Need?
For this project you need a few simple things that are easy to find online or at the craft store. One of the most important details to making a candle that burns well is matching the wick size to the candle you are making. Its easy to figure out because most wicks will say what size container they are made for on the pacage description. You will need the wicks, wax pouring pot, beeswax, plumbers putty, candy thermometer, candle mold, wooden skewers.

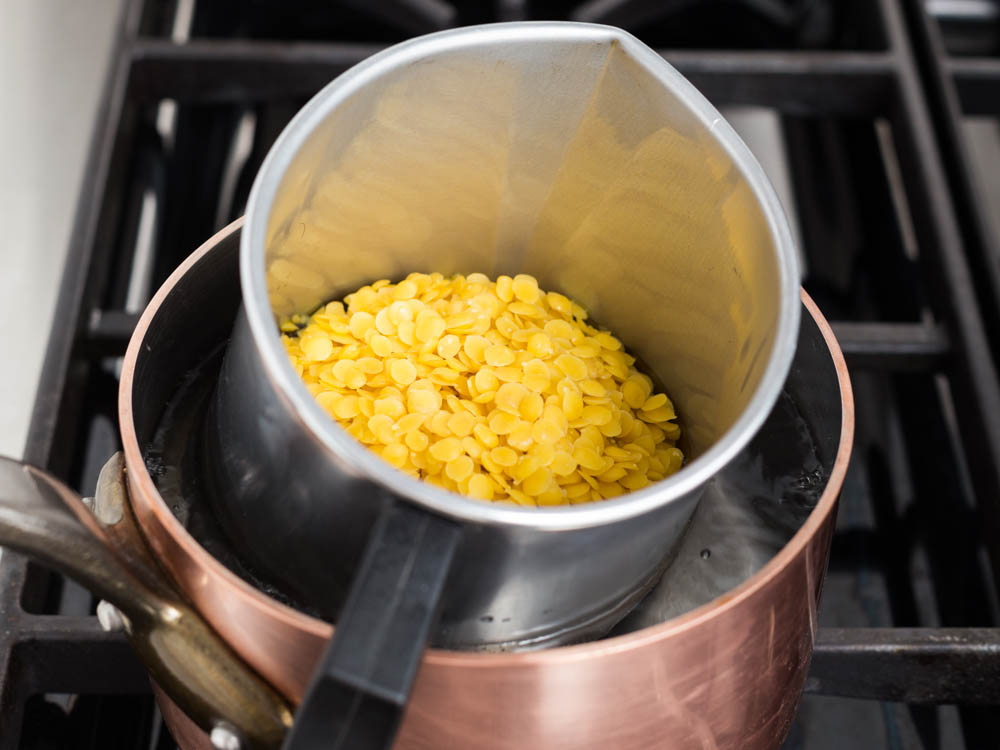
Step 1:
Pour the beeswax pellets into the wax melting pot. Set over a medium sized saucepan with enough water to surround the pot and bring to a simmer. Once all of the wax has melted and the heat has risen to 160° you are ready to pour.
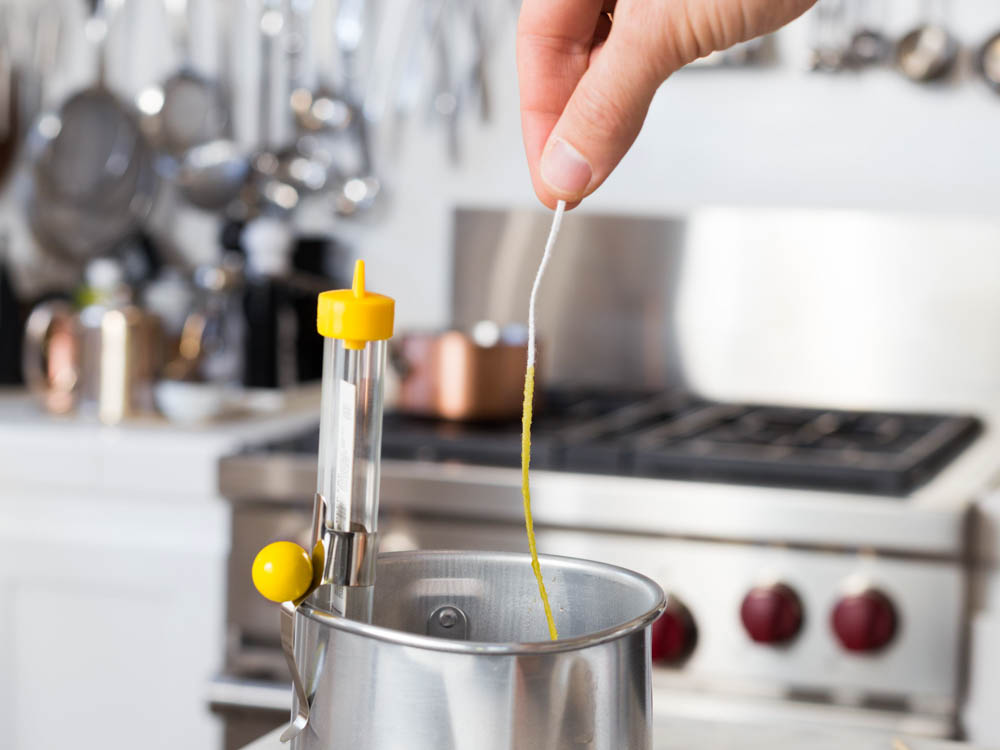
Step 2:
Measure out a length of wick and dip it into the melted wax, this will help the finished candle burn evenly.
Step 3:
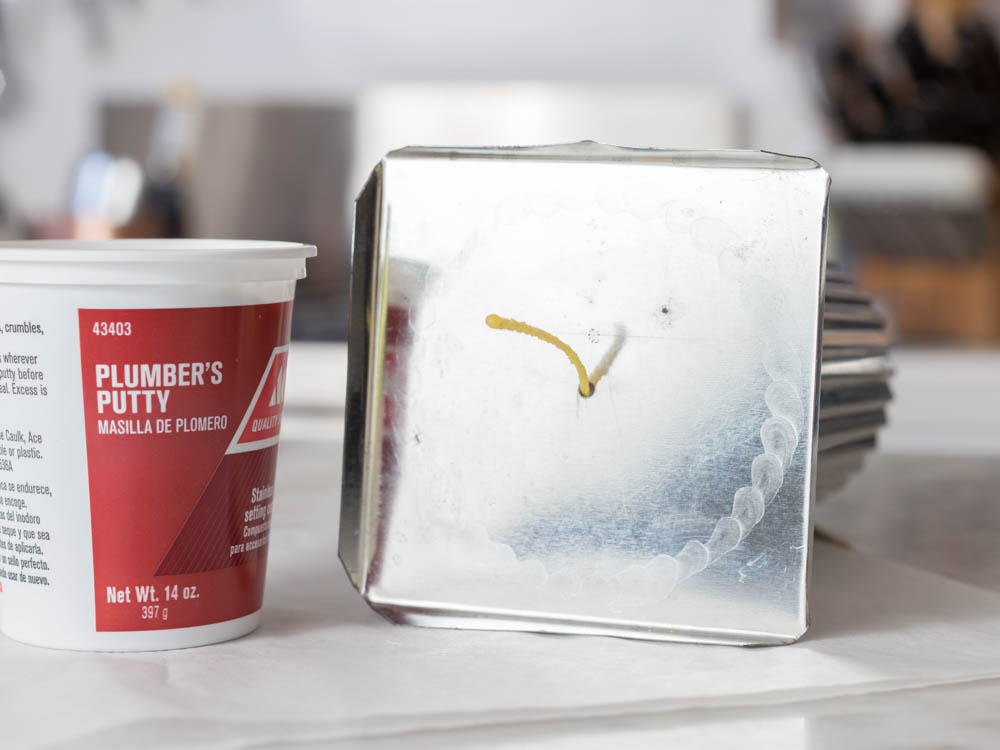
Feed the waxed wick throught the hole in the bottom of the candle mold.
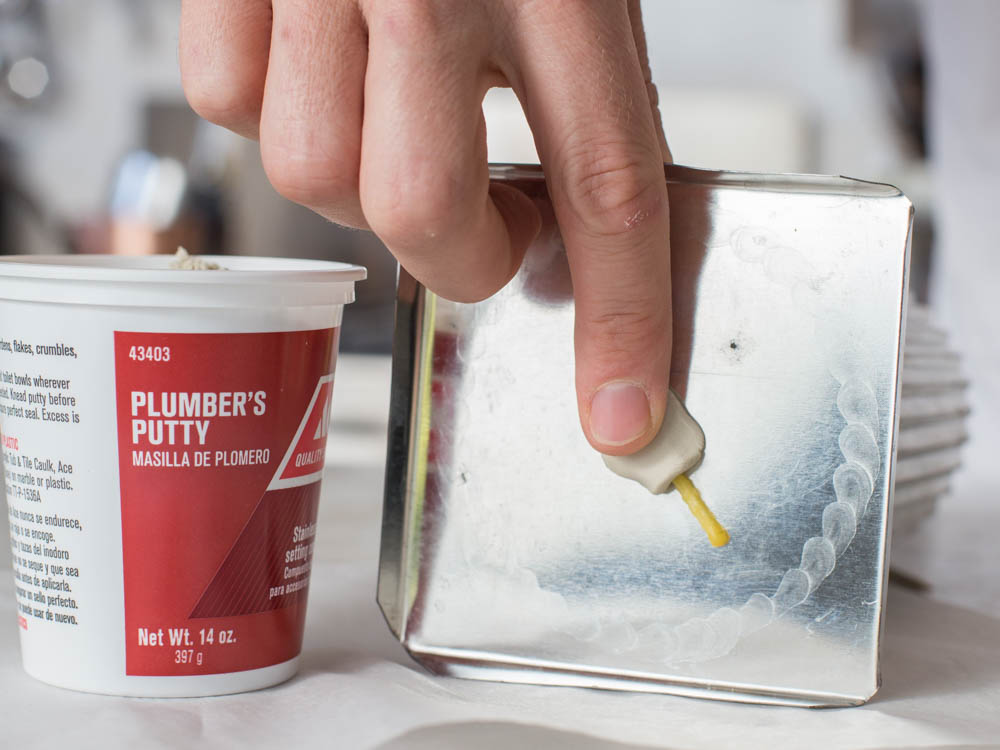
Step 3:
Fold over the wick and plug up the hole using plumbers putty. This prevents the wax from seeping out through the hole.
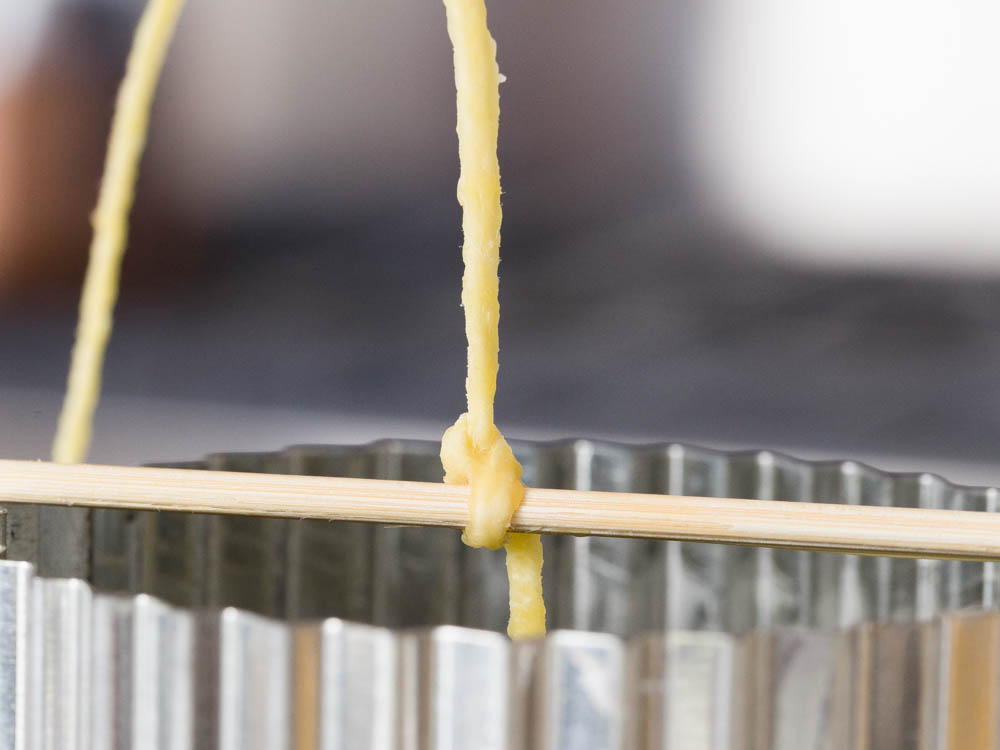
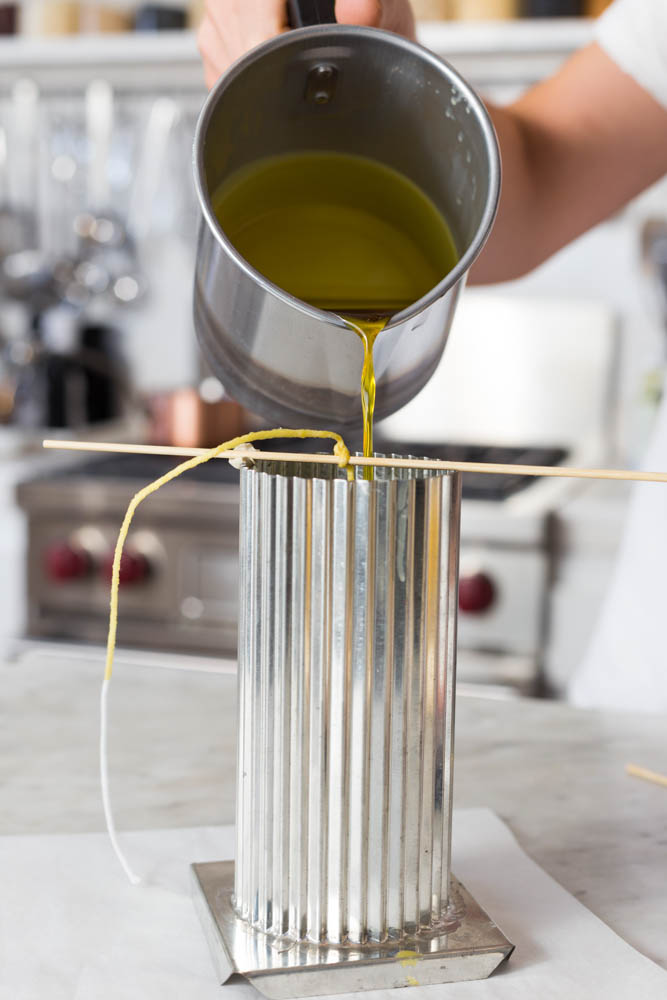
Step 4:
Tie the rest of the wick to the wooden skewer. Make sure the wick is straight and centered so your finished candle burns evenly.
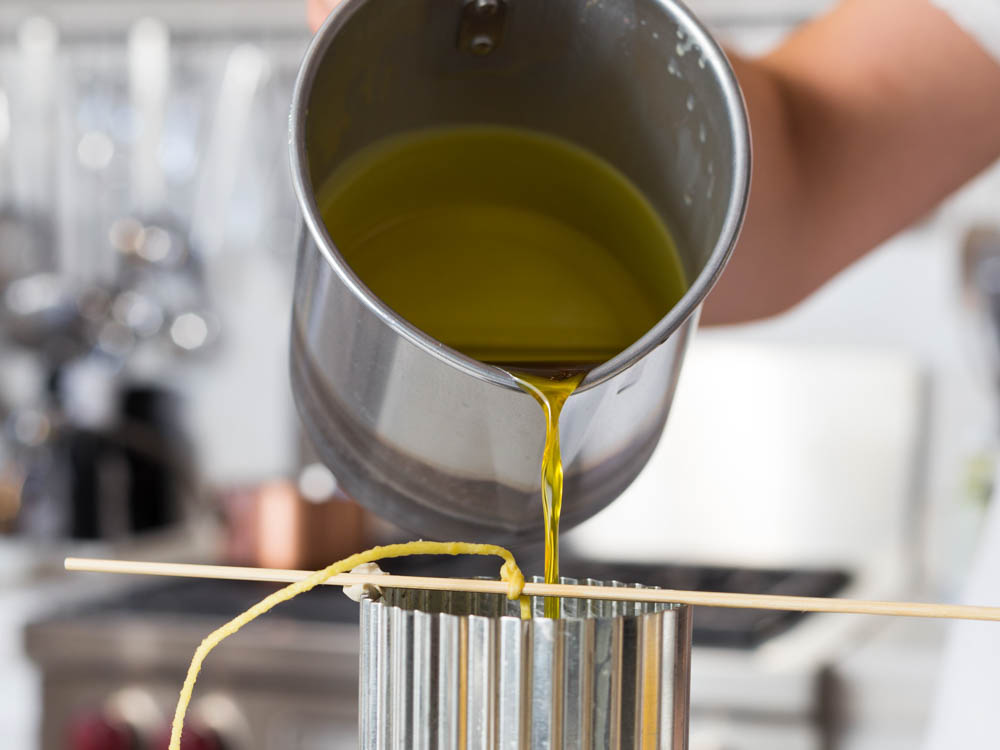
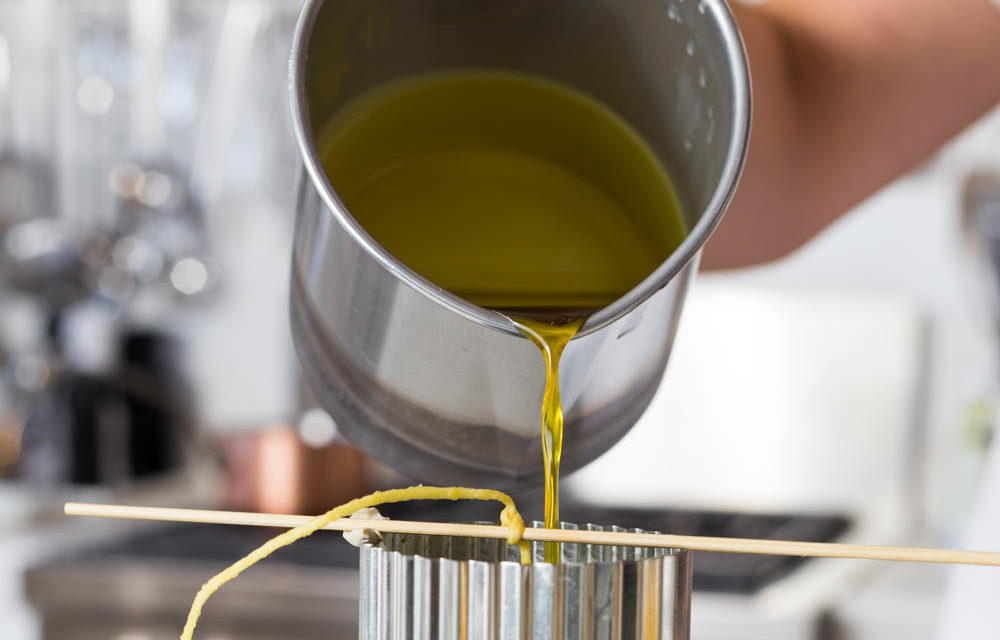
Step 5:
Pour the wax into the prepared mold in a slow and steady stream until it is 1/2 inch below the rim. If you pour too fast you can create unwanted air bubbles.
Step 6:
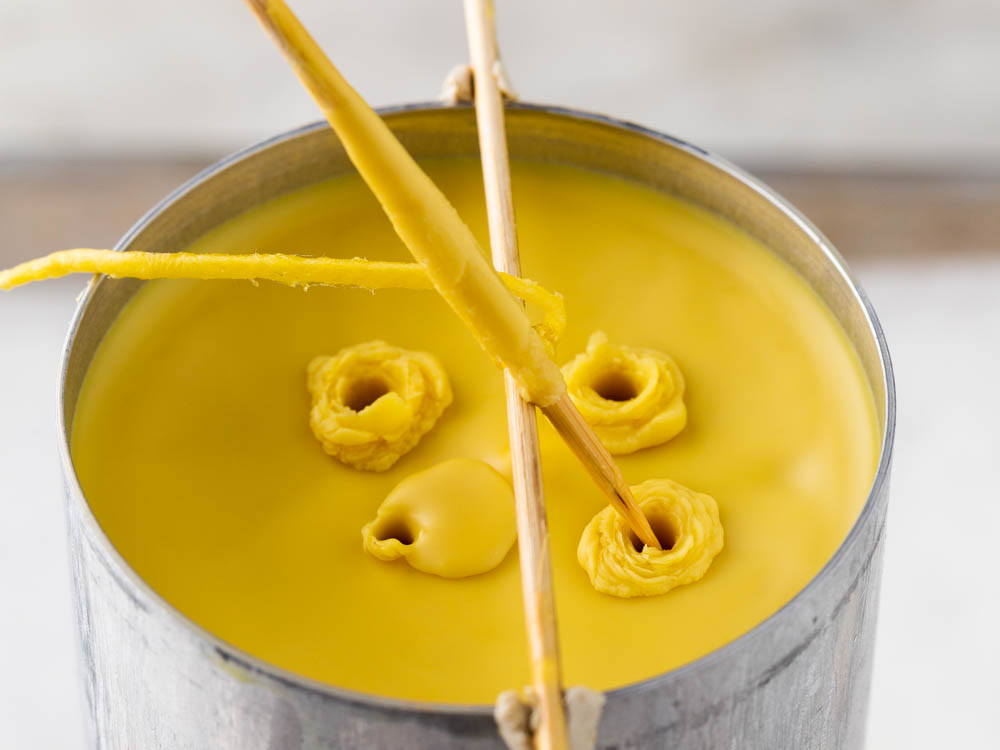
Let the mold sit for 30 minutes then use a skewer to poke a few holes around the wick. This releases any air bubbles trapped inside.

Step 7:
Fill in the holes with more melted wax. Let the candle cool for 45 minutes and repeat. Cool the candle at room tempurature for at least 8 hours.
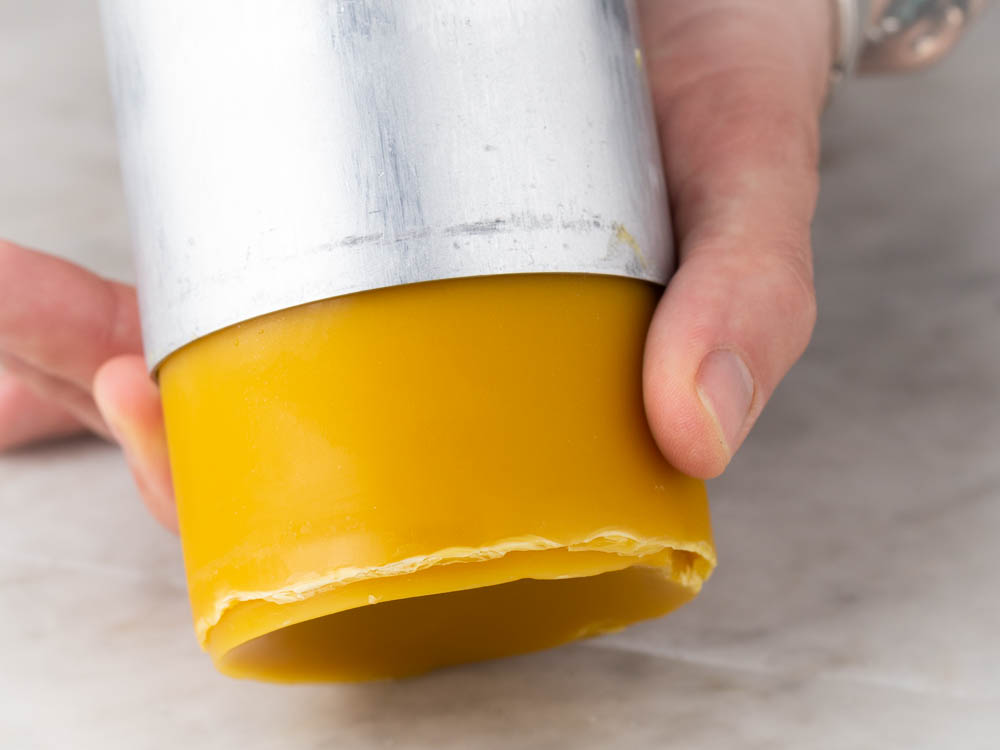
Step 8:
Place the candle in the freezer or refrigerator to make it easier to loosen from the mold. Give it a few taps on the sides to release the candle. This can be tricly the first few times and is aditedly the least relazing part of the whole job.
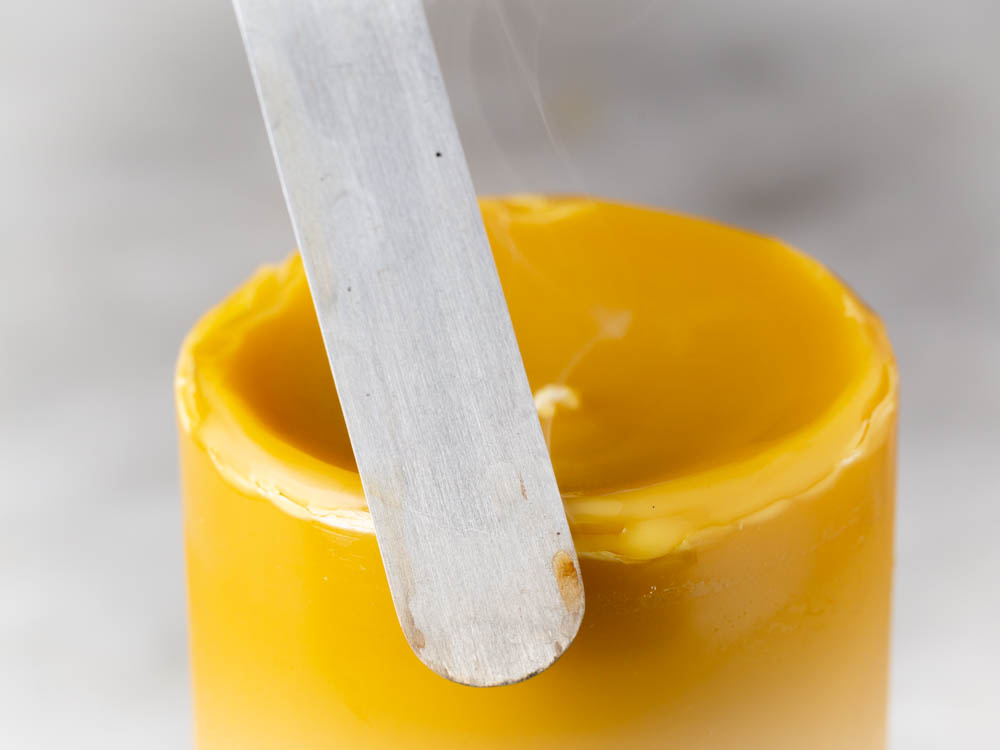
Step 8:
If the top edge needs to be smoothed you can easily do this by heating up a small metal with a lighter and smoothing the edges.
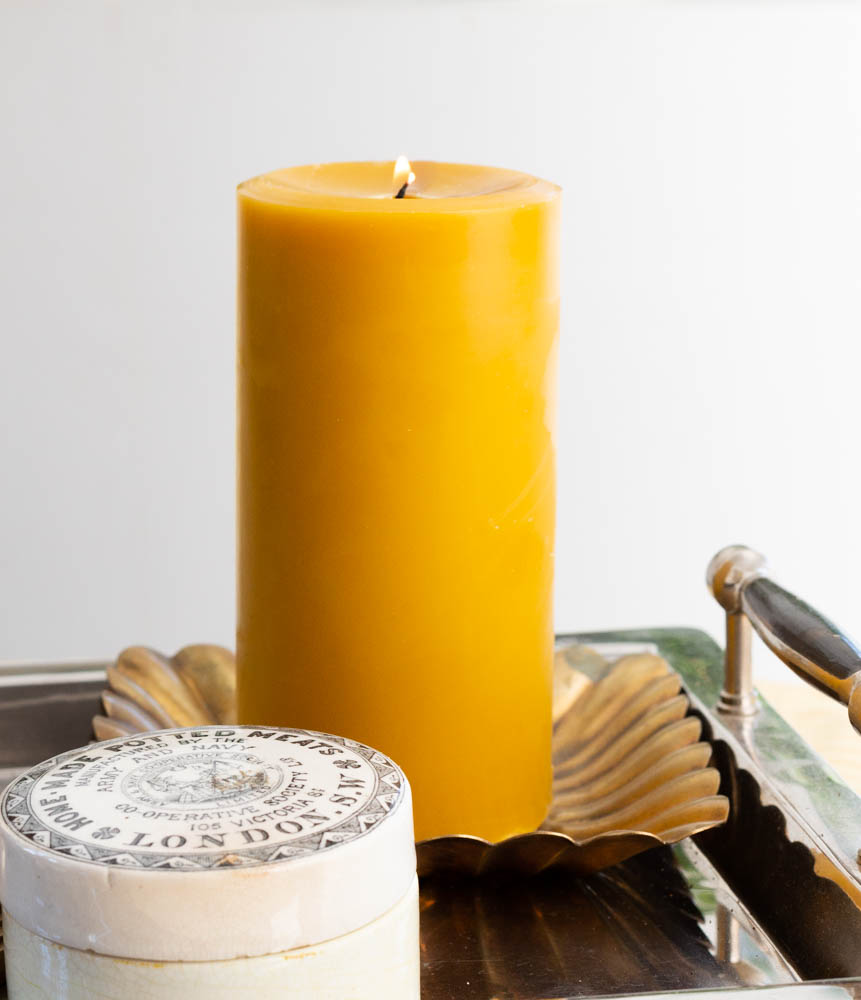
Now you have a beautiful home made beeswax candle that you can light and enjoy immediately. Candles also make great gifts that are not only loved by all but really affordable!


Be an Insider

How To Cut Citrus
Lorem ipsum dolor sit amet, consectetur adipiscing elit. Maecenas at eros risus. Morbi congue enim odio, laoreet cursus nisi dictum sed. Mauris ipsum velit, blandit vel bibendum nec, sollicitudin id nunc.


Love this little step into the candle making business. You make it sound really easy and quite fun! Relaxation is different for everyone and I think this one may be a “once size fits all” kinda deal. BTW there is a typo in the third paragraph :).